
Whether you’re upgrading a work truck, building an off-road rig, or adding better visibility for nighttime utility work, a properly mounted light bar can completely change how usable your vehicle becomes after dark. But while mounting a light bar looks straightforward, the details are what separate a clean, reliable setup from one that rattles loose, leaks water into the cab, or creates wiring headaches later.
This guide walks through the most practical mounting options, basic measurements to check before drilling, and a few installation tricks that make the final result look factory-installed instead of rushed together in the driveway.
First Things First: Check Your Vehicle Height
Before buying brackets or grabbing a drill, start with measurements.
Most states set maximum vehicle height limits around 13 feet 6 inches. That usually leaves plenty of room for trucks and SUVs, but roof racks, lift kits, oversized tires, and cargo systems can reduce your clearance faster than expected.
A quick pre-install measurement routine saves trouble later:
- Measure from the ground to the highest point of your roof
- Measure the light bar, including brackets
- Add both numbers together
Even if you’re nowhere near the legal limit, it’s still smart to account for parking garages, low branches, and carports if the vehicle doubles as a daily driver.
Choosing The Best Mounting Location
Different setups work better for different vehicles and driving styles. The best mount isn’t always the highest one — it’s the one that fits how the vehicle is actually used.
Roof Mount
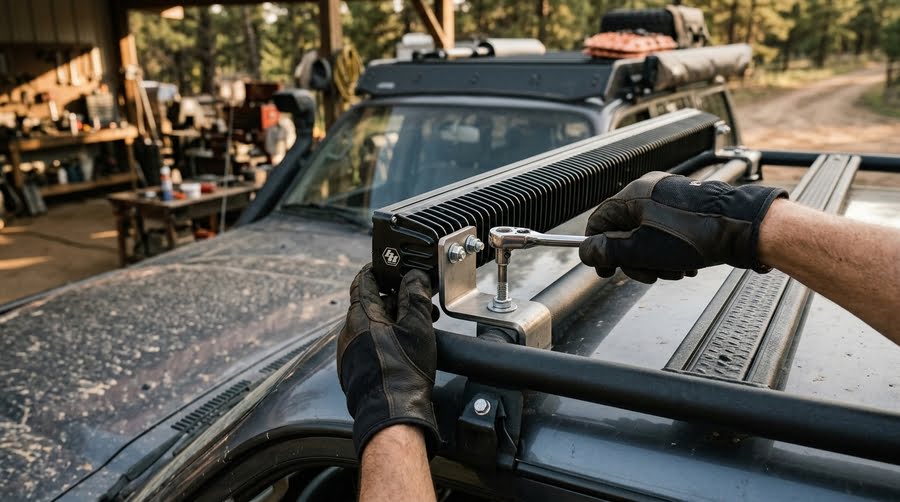
Roof-mounted light bars remain one of the most popular options for off-road builds and utility trucks because they provide excellent forward and side visibility.
They also create the clean, aggressive look many truck owners want. However, roof installs require more planning than people expect. Wind noise, vibration, and water leaks become problems when mounting points aren’t sealed properly.
A few tips that help:
- Use painter’s tape before marking drill holes
- Apply silicone sealant around any roof penetrations
- Use a thread locker on mounting bolts to prevent loosening over time
- Route wiring through the headliner for a cleaner finish
Taking extra time during installation makes the setup feel much more professional once everything is finished.
Grille Or Bumper Mount
If you want strong forward lighting without increasing vehicle height, bumper and grille mounts are often the better choice.
These setups are especially common on:
- overlanding builds
- tow rigs
- ranch and farm trucks
- trail vehicles
Because the light bar sits lower, installation is usually simpler, and maintenance is easier later if the wiring ever needs attention.
Lower mounting also reduces wind drag and avoids clearance issues in garages or covered parking.
Headache Rack Mount
Utility trucks and flatbeds often benefit from mounting directly onto a headache rack. This position keeps the light high enough for strong visibility while avoiding permanent roof modifications.
It’s also one of the sturdier mounting solutions available since many headache racks are already designed to handle equipment loads and vibration from rough roads.
For trucks used on job sites or remote properties, this setup often ends up being the most practical long-term option.
The Interior Mounting Option More Drivers Are Using
One mounting method that’s becoming increasingly popular is installing the light bar inside the windshield instead of outside the vehicle.
Many truck owners and volunteer responders now use high-intensity LED visor light bars for emergency vehicles such as Ultra Bright Lightz emergency vehicle lighting because they provide strong forward visibility while keeping the exterior clean and low-profile. Mounted along the inside top edge of the windshield, these systems avoid many of the issues associated with exterior roof mounting.
The benefits are surprisingly practical:
- no added vehicle height
- protection from rain and UV exposure
- cleaner exterior appearance
- easier wire management inside the cab
- reduced risk of damage from branches or low-clearance structures
For vehicles that serve multiple purposes — daily commuting during the week and utility or emergency use after hours — visor-mounted lighting can be one of the cleanest solutions available.
Wiring It Up Properly
A clean wiring job matters just as much as the mount itself. Poor wiring causes more problems than the actual hardware.
A few fundamentals make a huge difference:
Use A Relay
High-output LEDs draw enough power that they shouldn’t run directly through a basic switch. A relay protects the switch and helps stabilize the circuit.
Install A Fuse Near The Battery
Place the fuse within about 18 inches of the battery terminal. This protects the entire circuit if a short occurs.
Choose The Correct Wire Gauge
For many smaller LED bars, 14-gauge wire works fine. Larger setups may require 12-gauge wire to safely handle higher current loads.
Weatherproof Every Connection
Electrical tape eventually fails under heat and moisture. Heat-shrink connectors hold up much better long-term, especially on vehicles exposed to mud, rain, or off-road conditions.
Plan The Switch Location Early
Many DIY installers leave switch placement until the end, which usually results in awkward mounting. Planning the switch location before routing wires leads to a much cleaner dashboard setup.
Keep Local Lighting Laws In Mind
Before installing any auxiliary lighting, check your local regulations regarding color and on-road use.
Amber and white lights are commonly permitted for utility and off-road applications, while red and blue lighting is often restricted to authorized emergency vehicles. Rules vary by state, so verifying requirements before installation can prevent unnecessary issues later.
Before You Start Drilling
Running through a quick checklist beforehand can save hours of frustration later:
- Measure total vehicle height after installation
- Confirm local lighting regulations
- Test-fit brackets before drilling
- Plan wire routing in advance
- Verify mounting hardware compatibility
- Protect drilled metal surfaces against rust
- Double-check clearance around airbags and trim panels
A properly installed light bar should feel solid, quiet, and reliable, whether the vehicle is driving on highways, trails, or rough work sites.
With the right planning, a clean installation becomes one of those upgrades that improves both the look and functionality of the vehicle for years to come.